
Making Your Own Salt Piece
![]()
This activity was developed by Jennifer Strick, one of our "Explainers," the Exploratorium's docents who also staffed the permanent exhibition. She became very intrigued with artist Jörg Lenzlinger's Salt Piece exhibit and wanted to make one of her own. She began experimenting at home, and came up with the simple recipe below, which uses water and ordinary table salt (just like parts of Jörg Linzlinger's piece). We have included this activity as something for you to consider doing with visitors, museum professionals or for teachers who may be visiting your museum. It works relatively quickly, showing results in just a few days.
What You'll Need:
- A small plastic cup or jar which will not melt when hot liquid is poured into it (We used the bottom of a 20 oz. soda bottle)
- 2 feet of cotton string
- approximately 1/4 cup of ordinary table salt
- approximately 1 cup of water
- a saucepan
- a stove or hot plate
- food coloring (this is optional; it will color the crystals)
- a paper plate or paper towels to put under the project
|
|
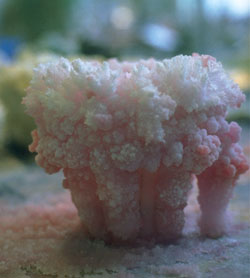
This image shows
a salt structure that was grown spontaneously from salt solutions.
It was one of the many salt pieces included in the Exploratorium's
1998 Turbulent Landscapes exhibition.
|
Step 1:
Cut the string into six or seven pieces, each about 5
inches long, and tie them together at one end so they look like like a
string bouquet.
Step 2:
To prepare the salt solution, bring the water to a rolling
boil in the saucepan. Add the salt and a couple of drops of food coloring
(optional). Mix with a spoon to help the salt dissolve. Continue adding
salt and mixing until no more salt will dissolve into the water. You should
now have a "super-saturated" solution. You might notice a film
of salt crystals forming in a layer on the surface of your solution. At
this point, turn off the heat and pour the solution into the plastic container.
Step 3:
Submerge the knotted end of your strings into the solution,
and arrange strings evenly so that the ends dangle over and around the
rim of your container.
Step 4:
Leave the container someplace where it's not likely to
be disturbed. You might want to put it on a plate or paper towel to catch
the drippings from the ends of the strings.
Step 5:
Wait. In a couple of days you should be able to see that
your strings have grown fatter from the crystallizing salt. If you continue
adding salt solution when it's evaporated below the knot, you should be
able to grow long salt stalagtites.
Try these other activities . . .
Print Nature Around You
![]() Growing Your Own Slime Mold
Growing Your Own Slime Mold
![]() Making
Turbulence Patterns
Making
Turbulence Patterns
