|
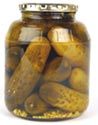

In this recipe, you ferment cucumbers to make dill pickles.
This means you’ll be setting up special conditions that
allow "good" bacteria to grow on your cucumbers.
These bacteria do not spoil your cucumbers. Instead, they
digest the cucumber’s sugars and produce lactic acid,
changing the vegetable’s flavor and texture—and
turning your cucumbers into pickles in about three weeks.
The lactic acid also helps to preserve the pickles.
Recipe
Conversions
|
|
|
|
|
|
What
Do I Need?
|
.
|
|
•
10
pounds pickling cucumbers, 3 1/2 to 5 inches in length
|
 CAUTION
Follow recipe exactly.
Careful setting up and monitoring
of conditions—ingredient quantities, temperature, time,
and cleanliness—are essential to the success and safety
of fermented pickles.
|
|
•
1/4
cup whole mixed pickling spices
|
|
•
2
bunches of fresh dill
|
|
•
1
cup white vinegar
|
|
•
3/4
cup coarse pickling salt
|
|
•
1
gallon of water
|
|
•
10
fresh garlic cloves, peeled
|

|
|
•
a soft vegetable brush
|
|
•
a 5-gallon plastic bucket or crock
|
|
•
a
glass or ceramic plate
|
|
•
a
zipper freezer bag (unused)
|
|
•
a
clean towel
|
|
•
a
cheesecloth
|
|
• a
large,
deep, stainless-steel, nonreactive pot
|
|
•
6
to 8 1-quart glass jars (clean)
|
|
•
canning
equipment
|
|
•
a
narrow plastic spatula
|
|
|
|
|
Questions
about ingredients or supplies? Read the
pickling
tips
.
|
|
|
|
|
What
Do I Do
?
|
|
|
NOTE:
Please read the
pickling tips
and
general canning instructions
before
starting this recipe.
1.
Using
a soft vegetable brush, thoroughly scrub the cucumbers in
cool running water. Cut 1/16 inch off the blossom end. Discard
any cucumbers that are bruised or damaged.
|
|
|
|
|
|
2.
Put
half the pickling spices and 1 bunch of dill in the bottom
of the plastic bucket or crock. Add the cucumbers.
|
|
|
|
|
|
3.
Mix
the vinegar, pickling salt, and water, dissolving the salt
completely. Pour over the top of the pickles. Add in the garlic,
the remaining spices, and the dill.
|
|
|
|
|
|
4.
You
must use a weight to fully submerge your pickles in the brine—or
risk spoilage during fermentation. To do this, first cover
the pickles with a glass or ceramic plate (no metal, please)
that’s a bit smaller than the opening of the crock. Then
fill a zipper freezer bag with more brine (make the brine
with original recipe proportions of salt, vinegar, and water),
make sure it’s tightly shut, and place it on the plate
.
|
|
|
|
|
|
5.
Cover
the crock with a clean towel and store at cool room temperature
(70° F–75° F is ideal).
|
|
|
|
|
|
6.
Check
the crock every day, and skim off the film that forms on the
top (this usually starts after a day or two). Make sure the
pickles are covered completely with brine. If necessary, make
a little more brine following the original recipe proportions.
|
CAUTION
The scum on the brine surface is yeast growth. If you don’t
remove it, your pickles will spoil.
|
|
|
|
|
7.
Let
the cucumbers ferment until evenly colored (olive green) or
evenly translucent throughout. This should take about 2 1/2
to 3 weeks. At this point, you can safely eat the pickles.
If your pickles are not yet well-flavored with dill, you can
leave them in the crock longer—but the total time in
the crock should not exceed 3 weeks.
|
CAUTION
Don’t taste your pickles until they are evenly colored
or evenly translucent throughout.
|
|
|
|
|
8.
Strain
off the brine from the crock through the cheesecloth to remove
impurities. Place the strained brine in a large nonreactive
pot.
|
 Tip
Tip
During fermentation, there may be a few white spots on your
pickles. Don’t worry; they’ll go away when you process
them.
|
|
|
|
|
9.
Prepare
your jars and lids
.
Pack the
pickles in the clean, hot jars
, filling to within 3/4
inch of the top of the jar rims. Add a few sprigs of dill
for garnish.
|
|
|
|
|
|
10.
Bring
the brine to a boil and pour it over the pickles, covering
them completely and filling to within 1/2 inch of the top
of the jars. To remove air bubbles, gently run the plastic
spatula (don't use a metal one) around the jar, keeping the
utensil between the pickles and the jar's inner surface. If
necessary, add more liquid to readjust headspace. Wipe any
residue off the jar rims with a clean, damp towel. Apply lids
and screwbands evenly and firmly until resistance is met—fingertip
tight.
|
|
|
|
|
|
11.
Process jars
for 15 minutes in
a boiling-water canner.
|
|
|
|
|
|
12.
Let
the pickles sit for at least 1 week before eating, so the
flavors can mellow.
|
|
|
|
|
|
What
Else Can I Try?
|
.
|
|
•
How do you encourage "good"
bacteria to grow?
•
Learn more about fermentation.
 Share
& Discuss:
What
is your method?
Share
& Discuss:
What
is your method?
|
|
|
-
- -
Pickles Home Page
-
- -
Kitchen Lab
-
- -
|